We are nearing the end. . . only 1 more box to go after this week. If you are interested in storage crops, but haven’t placed your order yet, there is still time!
Also, please continue to use your CSA discount at all of our remaining farmers markets. Thursday Market continues until October 18th and Tuesday goes until October 30th. We are hoping to make it all the way until the last Saturday Market which is November 10th.
What’s in Box #19?
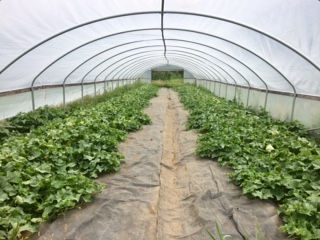
 Spinach: Cold nights make sweet greens. The spinach is looking big and beautiful. This should keep well in the fridge for a week or more – keep it in a plastic bag or other covered container, out of pooling water.
Gypsy Peppers: This is the last batch of peppers. They are still nice and sweet. You can eat them raw or roast them to use in your favorite hot dishes. Yummy when sauteed.
Cabbage: Kilagreg variety. A nice, hearty head of green cabbage. Will last a long time in the fridge. If you can’t use it all at once, no problem. Put the cut side down on a plate or cover with plastic wrap. Great for kraut and slaw.
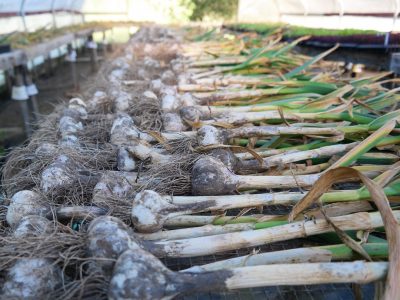
Garlic: Music variety. Easy to peel with great flavor. These have been cured, so feel free to keep them on your kitchen counter.
Carrots: Merida variety. Time for soup! These sweet roots will last for months in the fridge in a plastic bag with a little moisture.
Delicata Squash: This squash is so sweet! A great complement to many fall dishes. No need to peel before cooking. The skin is edible and will soften when cooking.
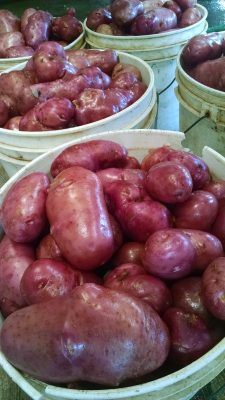
Potatoes: Desiree variety. Our potatoes have been cured for long-term storage and have not yet been washed. Keep them in a cool, dry, dark place.
Recipes:
Crispy Delicata Squash Cheddar Fritter
When I hear the words Delicata squash all I can think is YUMMY! Delicata are sweet, tender and an awesome way to bring the season to a close. These squash cheddar fritters are cheesy and hearty to keep your belly warm as the nights get colder and days get rainier. Written to be an appetizer, I could definitely see myself putting away a whole plate of them by themselves for dinner. ~ Laura
https://www.fearlessdining.com/delicata-squash-cheddar-fritters/
Ingredients
1 1/2 cups shredded delicata squash 1 large squash
1/4 cup milk
1 cup Cheddar Cheese shredded
1/4 cup Parmesan cheese
1/2 cup flour
1/2 teaspoon baking powder
salt and pepper to taste
garnish with sour cream and scallion.
1/4 teaspoon * optional cayenne pepper
1/4 cup avocado oil or other high heat oil
Instructions
1. Peel the rind off a delicata squash.
2. Cut the squash in half and remove the seed.
3. Use a grater to grate the squash into a bowl.
4. Add all other ingredients.
5. Mix well.
6. Set up a large platter with paper towels on the bottom.
7. Heat oil over high heat in a pan.
8. When the oil is hot (drop a drip of water in, if it sizzles, it is hot enough)
9. Drop the batter into the hot oil.
10. Cook 2-3 minutes then flip so the other side cooks.
11. Remove the fritters from the oil and set onto the paper towels.
12. Top with sour cream and scallions.
♦ ♦ ♦ ♦ ♦ ♦ ♦
Potato Pancakes
4-6 medium-sized potatoes (2 for every 3 people)
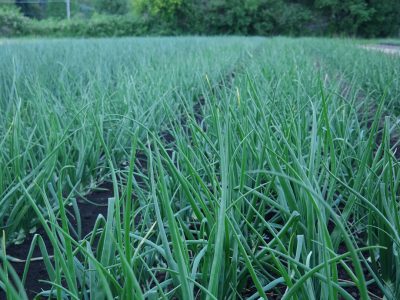
1 bunch green onions
1 shallot
4 cloves garlic
1 bunch parsley
2 eggs
2 tablespoons all-purpose flour
Grate the potatoes into a colander either in the sink or with a bowl underneath and lightly salt and mix up. Let liquid drain from potatoes for at least 20 minutes, pressing every 5-10 minutes to squeeze excess liquid from the grated potatoes. Potatoes can be grated and salted and let to sit overnight for quick preparation in the morning. Dice the green onions, shallots, garlic, and parsley and add to potatoes. Whisk eggs and incorporate them with the vegetables and potatoes. Add flour until potatoes can form a loose ball when pressed. Grease a stove top skillet and add small scoops of potatoes to a hot fry pan. Press down the scoops on pan to flatten them into flipable shapes. Potato pancakes take longer to cook than doughy griddle cakes, and can be checked for doneness by lifting up edges and checking the brownness of underside, usually 10 or so minutes per side. Pancakes can be kept warm in a 150 degree oven until they are ready to serve. The fresh herbs and oiled starches are great paired with either a sweet topping of syrup or fruit spread, fresh yoghurt or cheese, or a savory chutney.
Source: Martha Perkins
♦ ♦ ♦ ♦ ♦ ♦ ♦
Bubble & Squeak Cabbage
The name for this English dish comes from the bubbling of the vegetables as they boiled for their first cooking, and the way they squeak when they are fried. And boy does the cabbage make this dish.
4 tsp butter or oil
1 onion, finely chopped
1 lb potatoes, cooked and mashed
8 oz cooked cabbage, finely chopped
salt and black pepper
•Heat half the butter or oil in a heavy frying pan. Add the onion and cook, stirring frequently, until softened, not browned.
• Mix together the potatoes and cabbage and season to taste with salt and plenty of pepper.
• Add the vegetables to the pan, stir well, then press the vegetable mixture into a large, even cake.
• Cook over moderate heat for about 15 minutes, until the cake is browned underneath.
• Hold a large plate over the pan, then invert the vegetable cake onto it. Add the remaining butter or oil to the pan, then, when hot, slip the cake into the pan, browned side uppermost.
• Cook the bubble and squeak over a moderate heat for a further 10 minutes or so, until the underside of the cake is golden brown, then serve hot, cut into wedges.
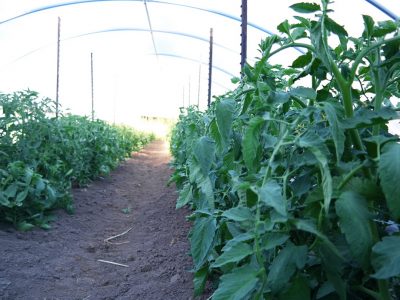
 Last week marked the end of this season’s Community Supported Agriculture (CSA) program here at Horton Road Organics.
 1. Debra and Lisa decide on a list of vegetables for the week’s boxes, balancing factors such as abundance of crops in the fields and variety in the boxes from week to week. The whole crew then heads out into the morning to harvest.
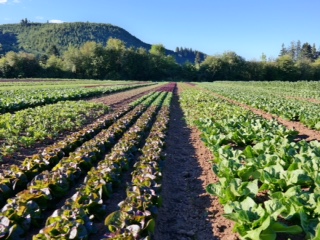
 2. Back at the Pack Out, harvested crops are washed and prepared for packing.
 3. We assemble the CSA boxes, carefully packing the produce.
 4. The CSA boxes are loaded into the cooler, ready to be picked up by members or delivered to Pick Up locations in Eugene.
 Thank you to all of our CSA members for supporting the farm and being a vital part of our community. I hope you’ve enjoyed receiving this season’s boxes as much as we’ve enjoyed making them for you!
 Spinach